Upload Documents
This guide provides step-by-step instructions on how to upload documents in Scarlett Mortgage through either the Applicant Portal or the Documents & Forms section.
Video Walkthrough
Step-by-Step Guide
Upload Documents Through the Applicant Portal
For documents that were requested from your applicant, you can upload through the deal into the applicant portal. This allows the client to have visible confirmation that the documents were received.
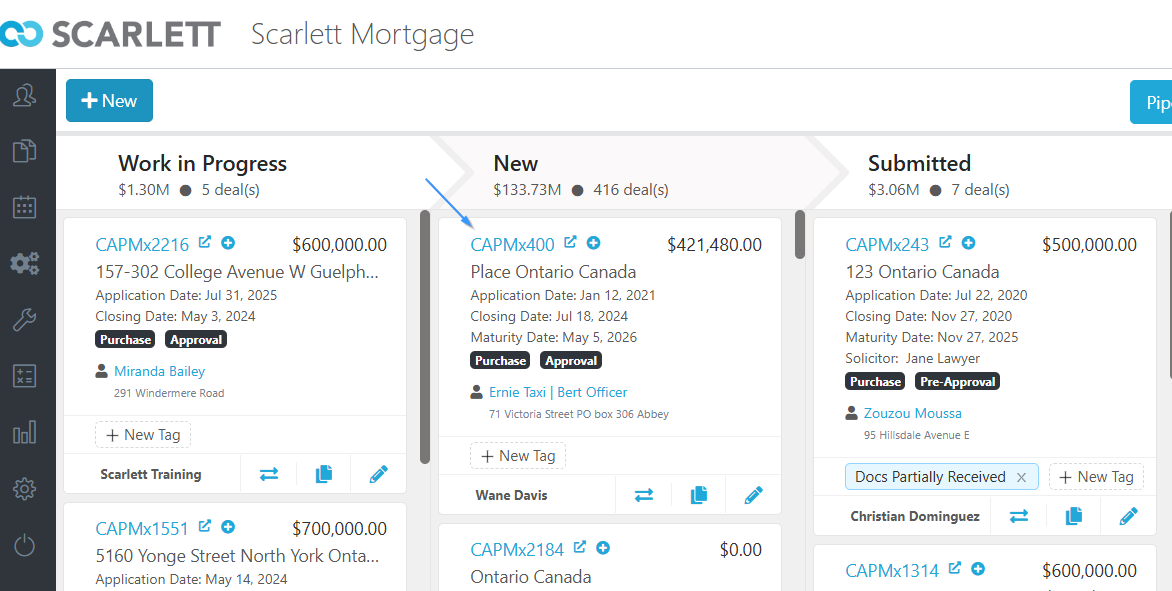
1) Go to your deal dashboard and select the deal you want to upload documents to. Here we will open deal 400.
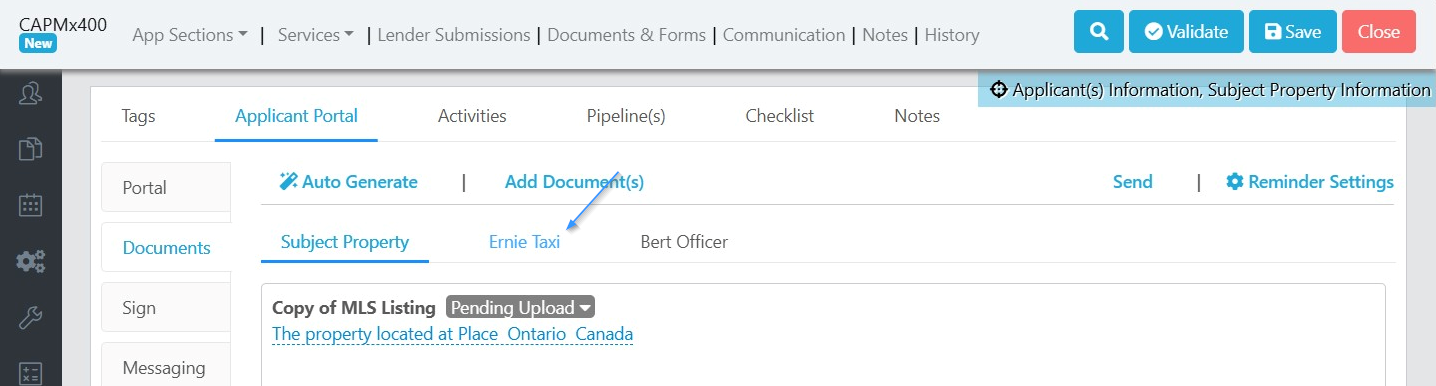
2) Click on "Applicant Portal"
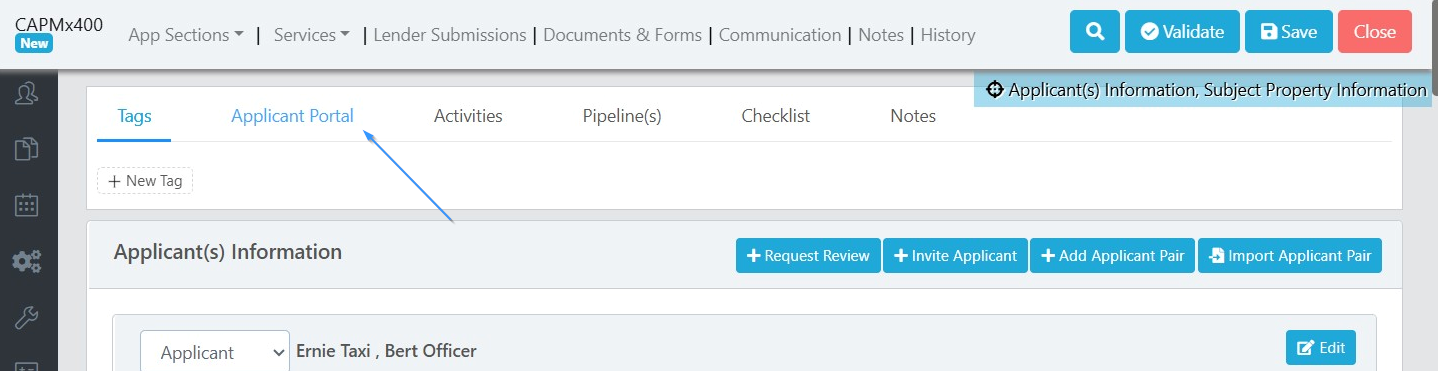
3) Click on "Documents"
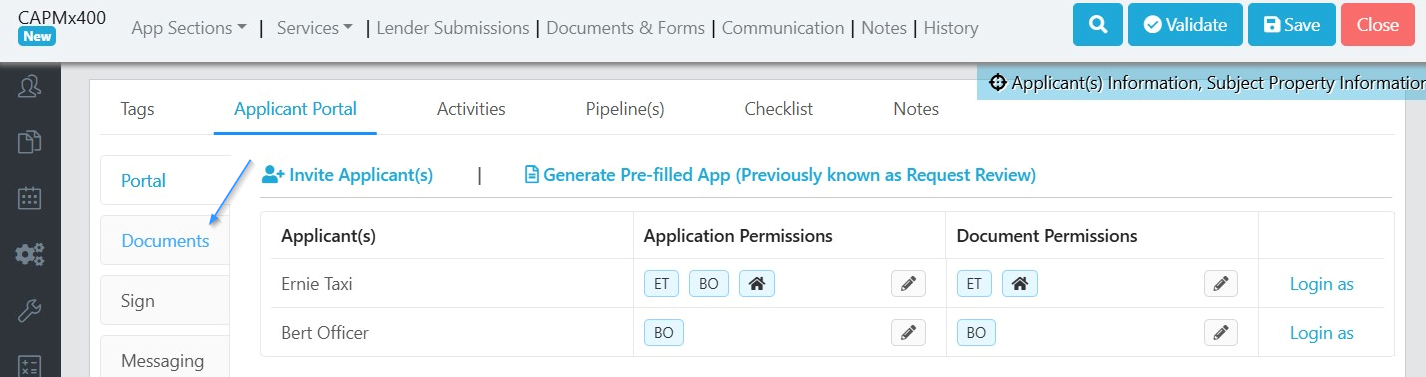
4) The document tab opens automatically on the Subject Property. To upload documents for an applicant, click on their name.
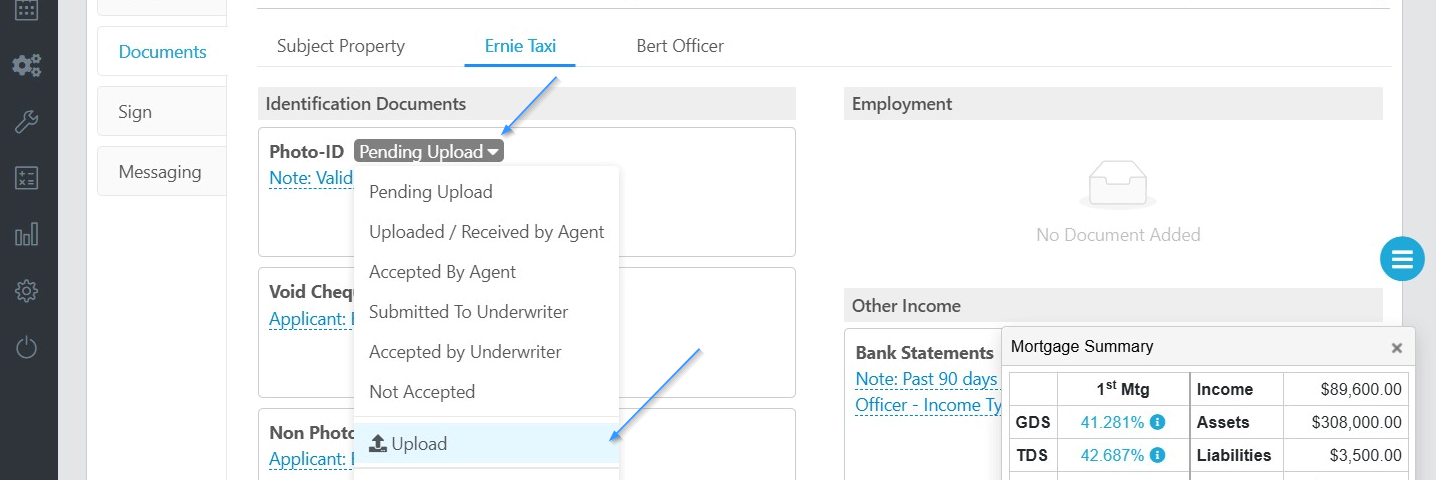
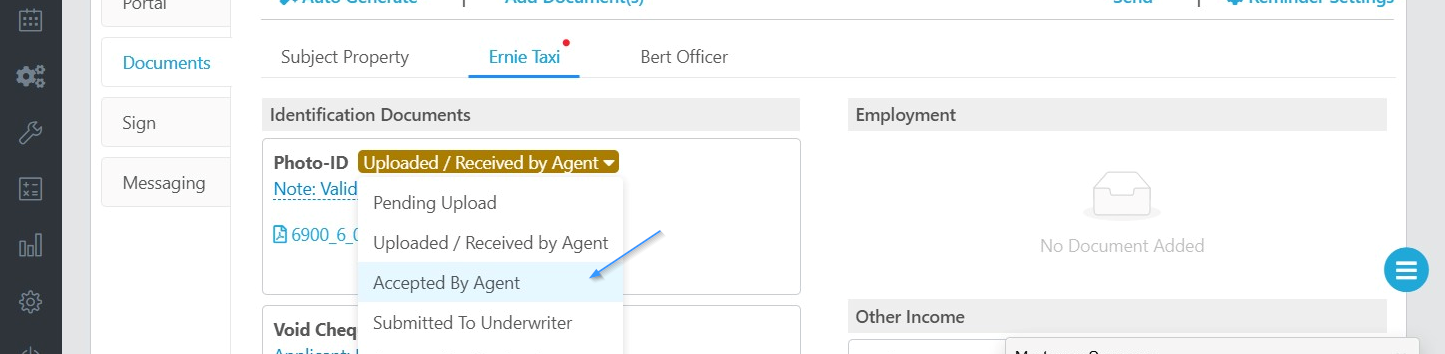
5) Click the status dropdown next to the document type you wish to upload. Here we'll click on the status next to Photo-ID. Then click "Upload".
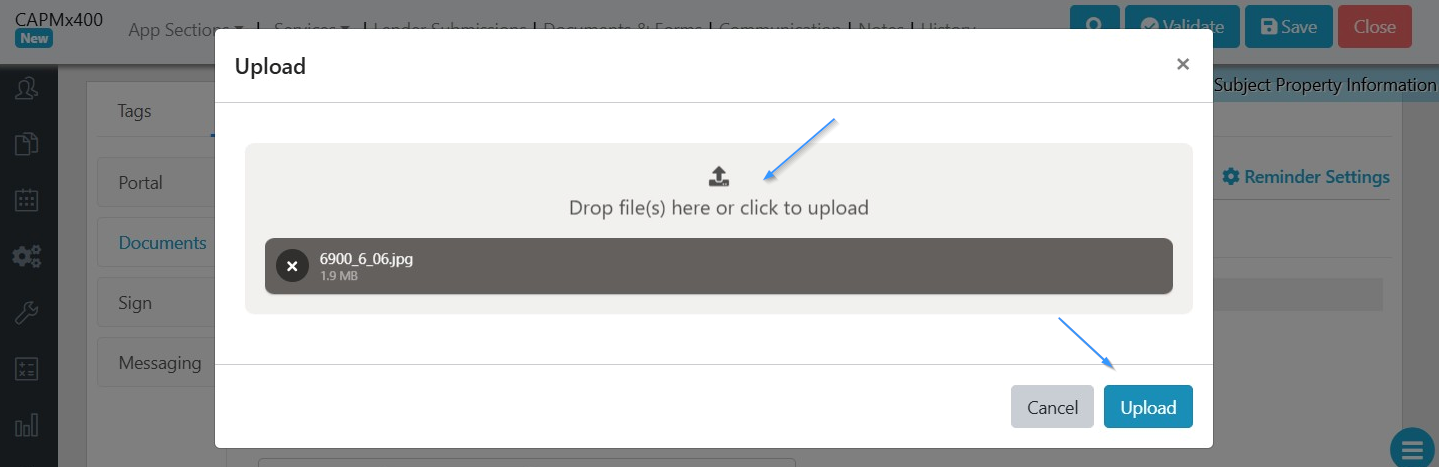
6) Drag and drop or click to add the document or documents you wish to the upload. Click "Upload".
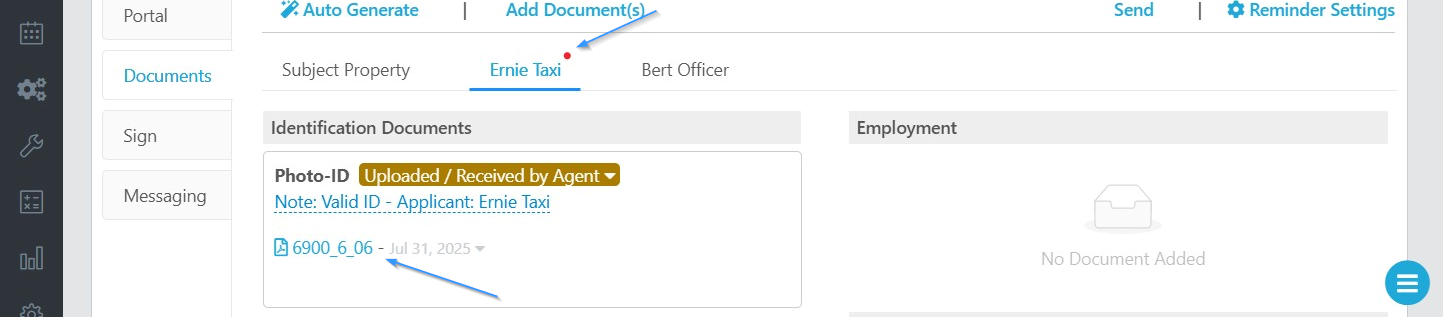
7) The document is now listed under the Photo-ID category. Note that because there is a new document uploaded, the red dot appears next to the applicant's name. If someone else on our team will be reviewing the document, we can leave it as is.
8) If we already reviewed the document, we can change the document status to accepted or not accepted, as applicable. Let's mark this one as accepted.
9) The document is now reflected as Accepted.
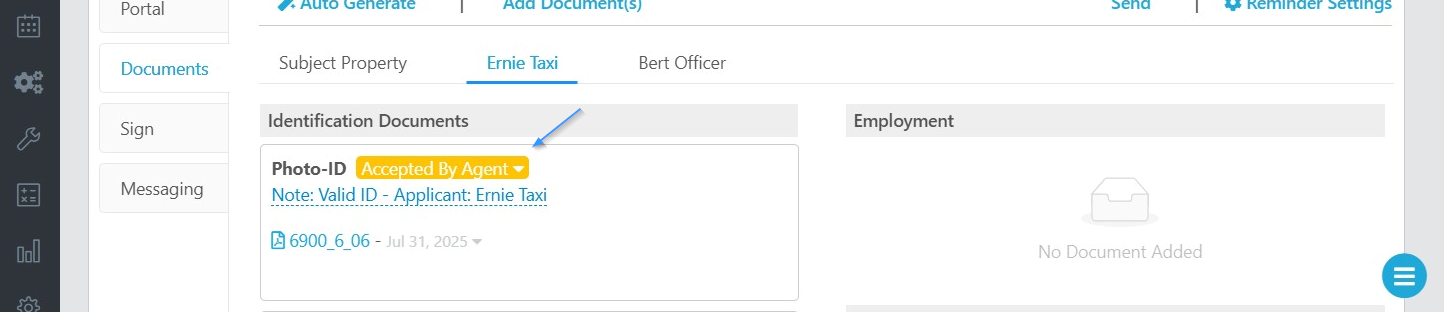
10) Because we uploaded through the Applicant Portal section, when the client logs in to their portal they will see the name of the document we uploaded, and the accepted status.

Upload Documents Through the Documents & Forms
For documents that aren't requested from your applicant, or documents you don't want the applicant to be able to see titled in their portal, you can upload into the folders section of the deal.
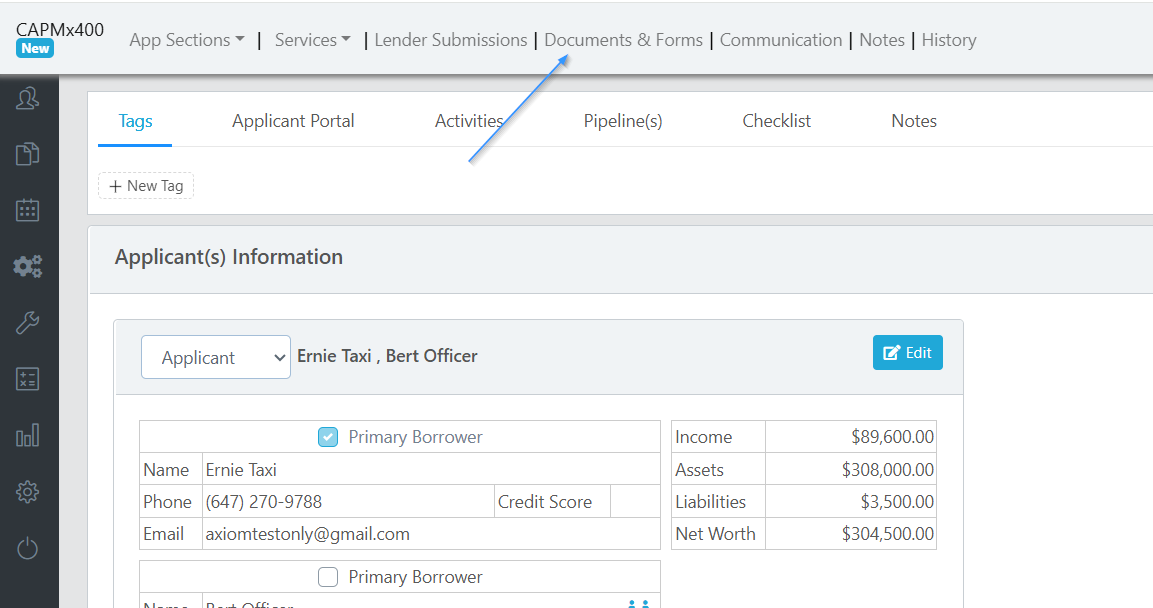
1) Go to your deal dashboard and select the deal you want to upload documents to. Here we will open deal 400.

2) In the upper menu bar, click on documents and forms
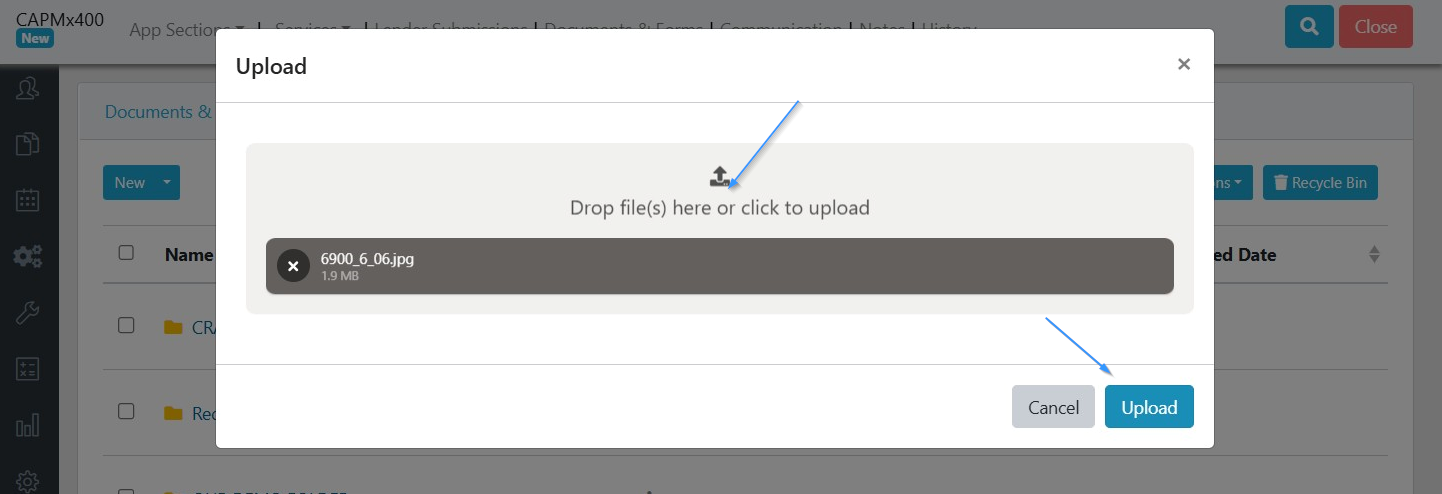
3) Now in the upper left corner click upload
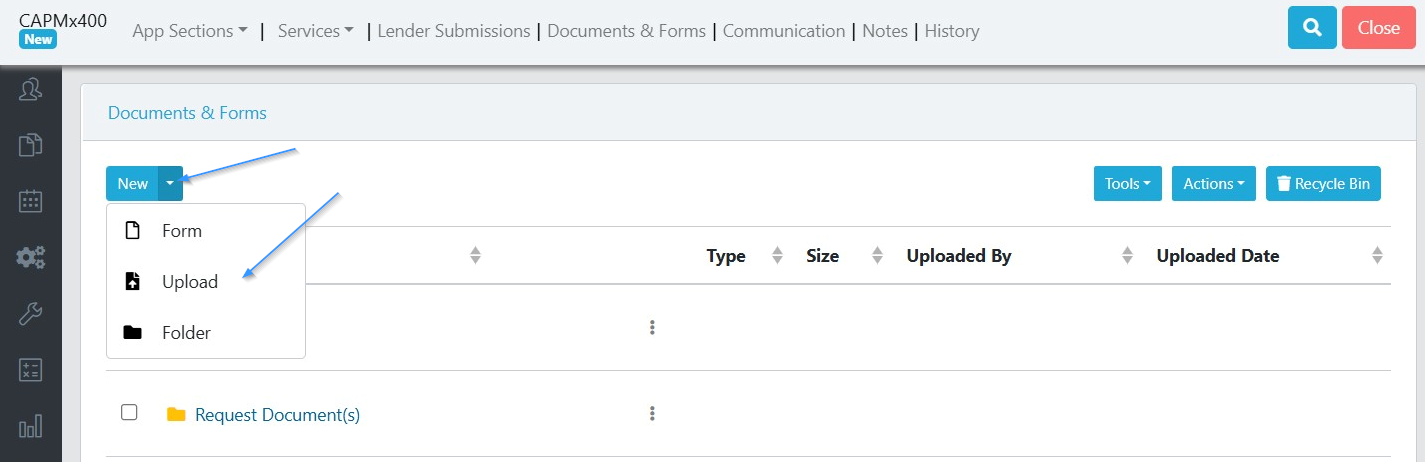
4) This opens an upload window where you can either drag or drop documents into the window or select and click them from the file menu. Once completed, click upload.
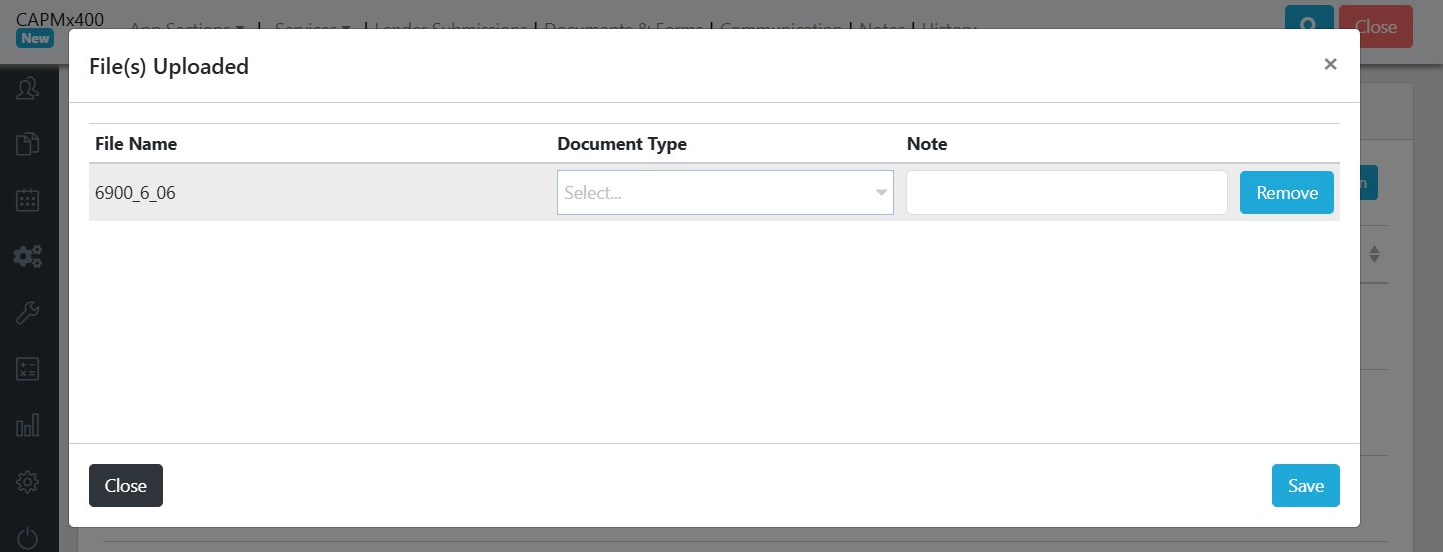
5) In the upload files window, you can remove the documents, specify the document type, and add notes. When you are done, hit the "Save" button.
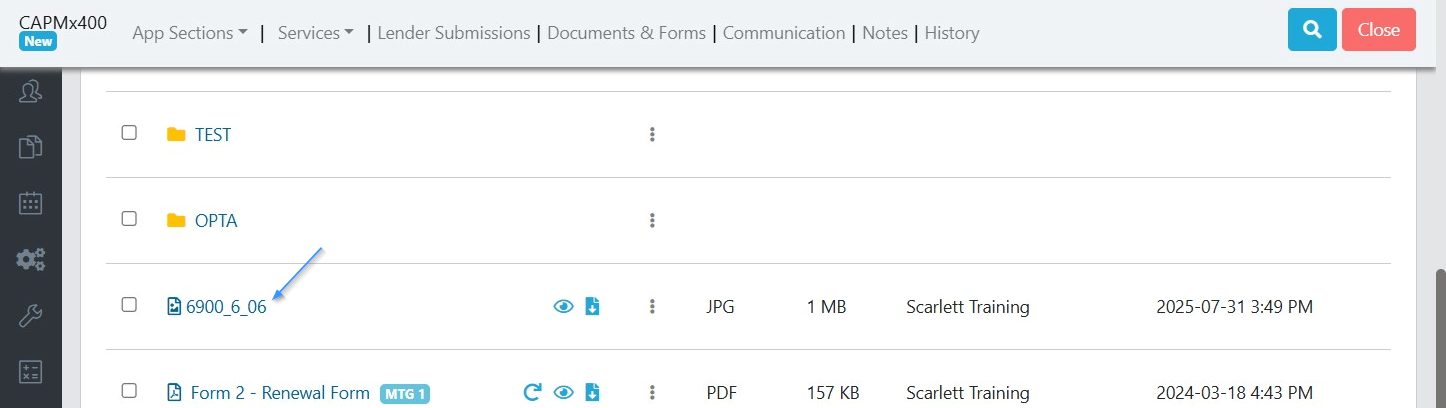
6) As you can see, the document has been added to your files
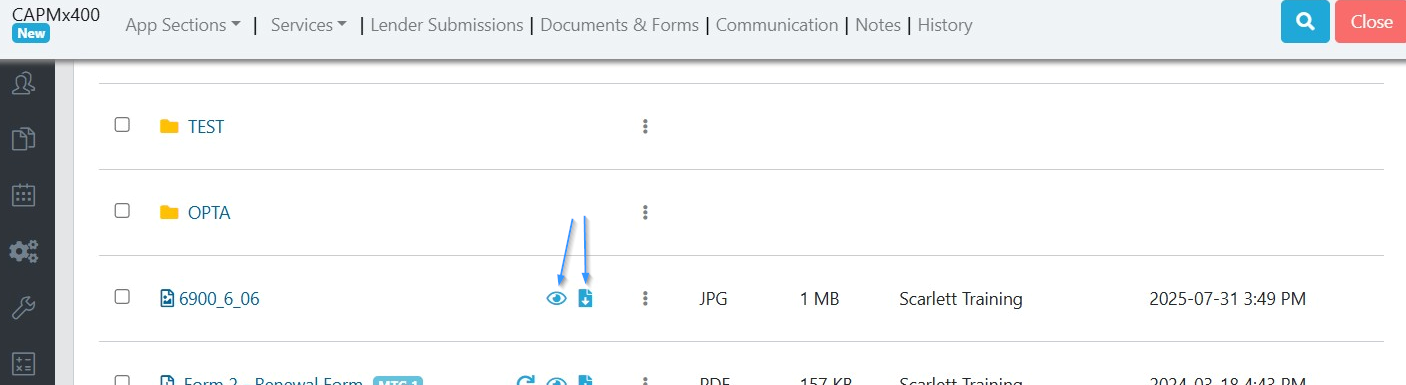
7) You can click on the eye symbol to preview the documents or the download document button to download the document to your computer
Documents added this way are not visible on the Applicant Portal.