Pulling Credit Bureaus
This guide provides a step-by-step process for easily requesting a credit bureau report and copying the liabilities into Scarlett Mortgage.
Related Training
Step-by-Step Guide
Credit Consent
If your clients submitted their application online, the credit consent they digitally signed can be found under the Internal Notes section of your application.
If your clients did not submit the application, or complete a request review, you will need to obtain consent prior to doing your credit pull. Please reference your brokerage guidelines on this. The below steps are an example of what may be acceptable to your brokerage.
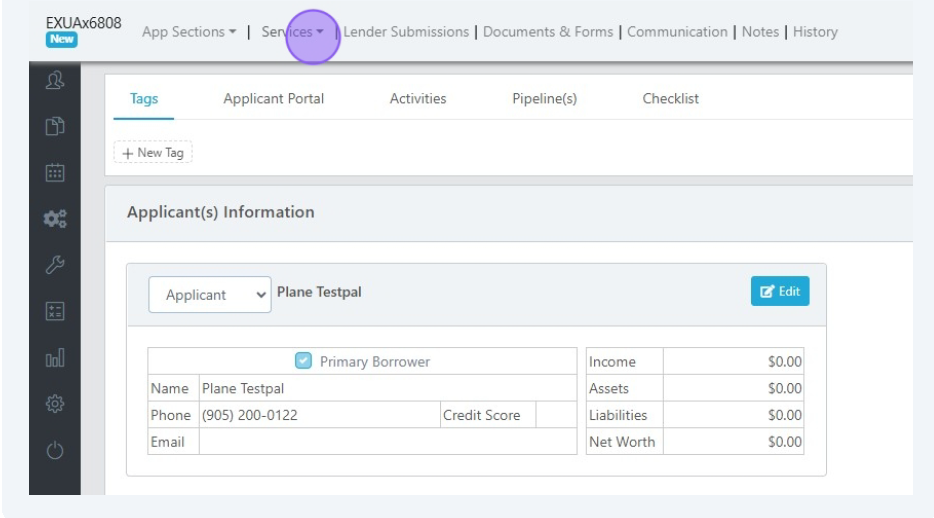
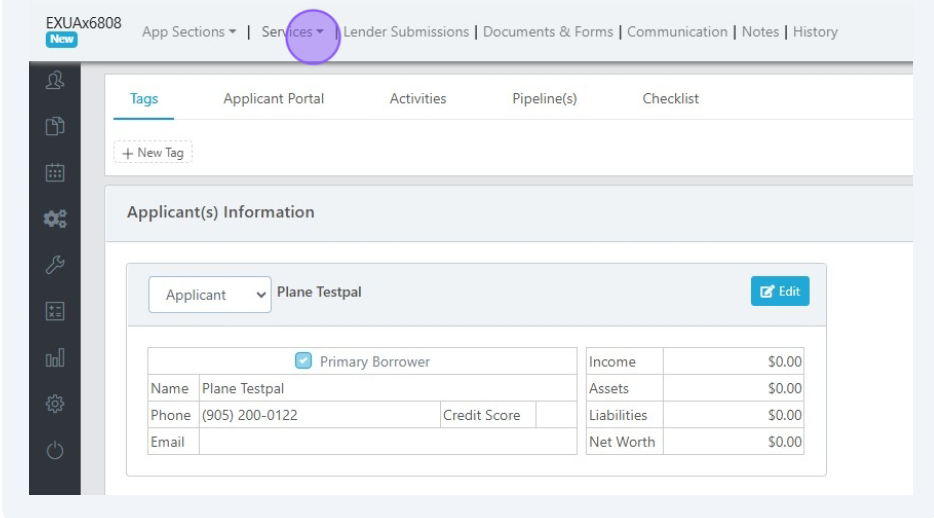
1) Within your deal, click "Services"
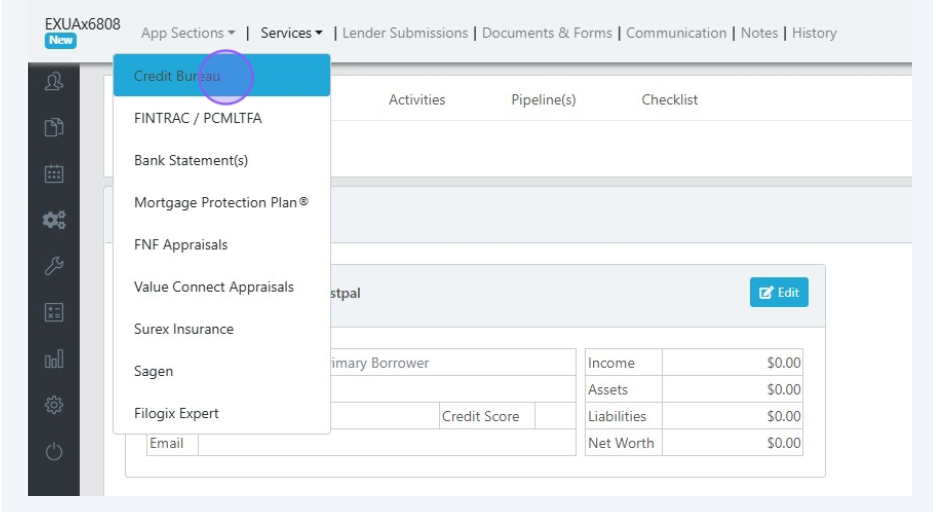
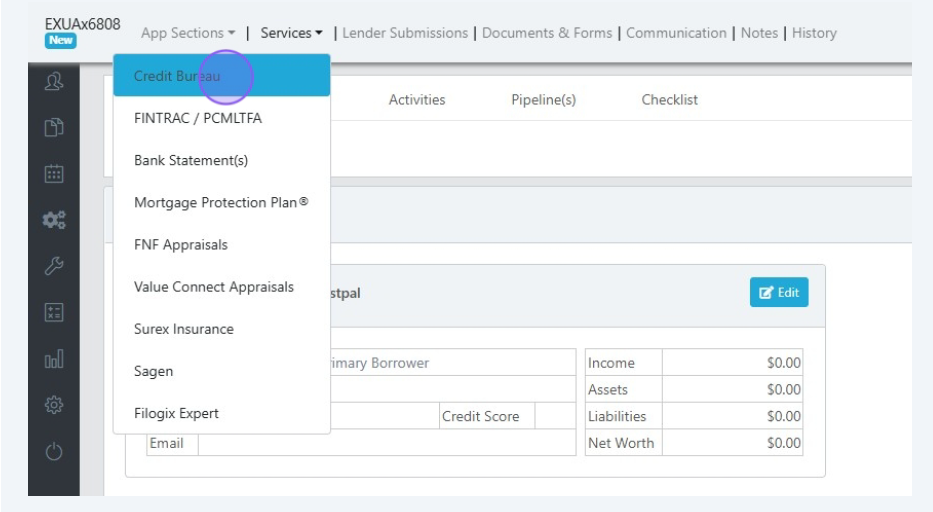
2) Select "Credit Bureau"
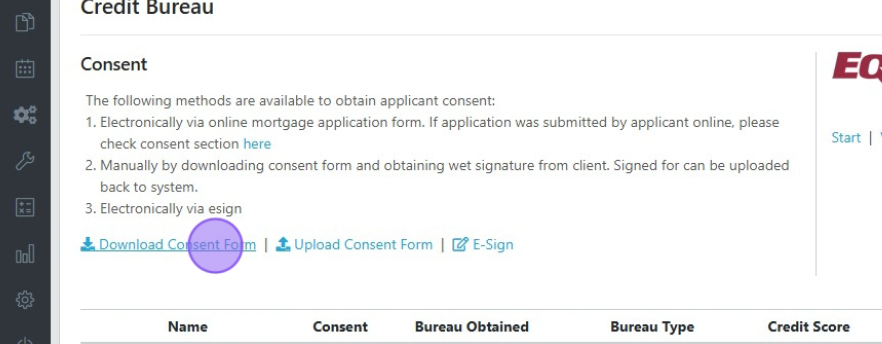
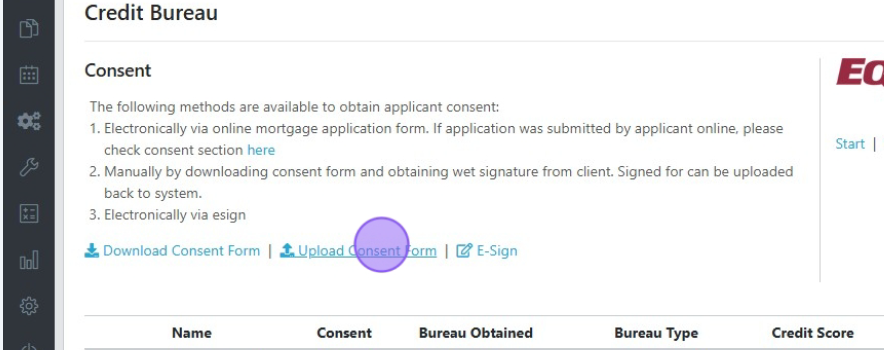
3) Click "Download Consent Form"
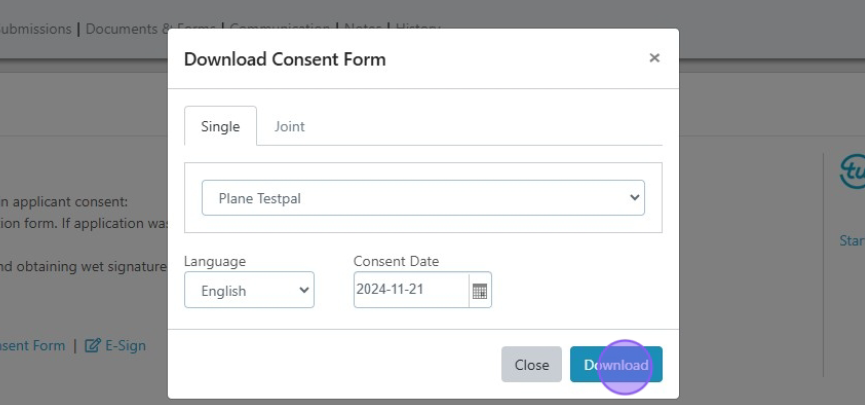
4) Select single or joint consent, select the language, and enter the consent date. Then click "Download".
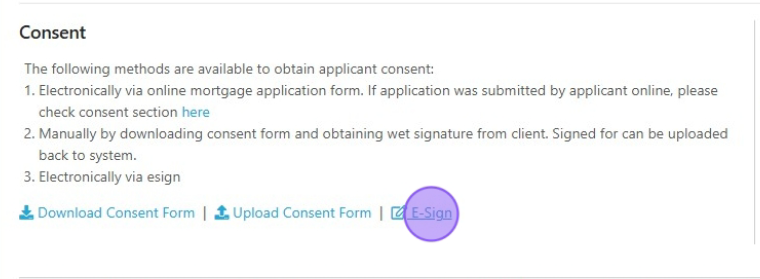
Note that you can also use the E-Sign option to send the consent form to your client for signature. This is done via Docusign and costs credits, unless you have the Convenience Plan with inclusive e-signing.
5) Once your applicants have signed the consent form, return to this section and click "Upload Consent Form"
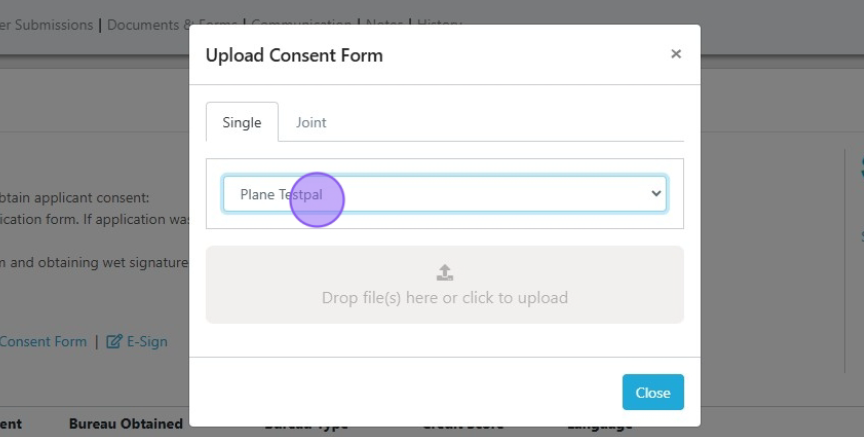
6) Select single or joint, and choose the applicant name(s). Upload your signed consent and click "Close".
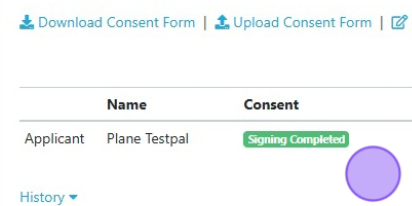
7) You will see the consent status update on the file to "Signing Completed".
Requesting the Credit Bureau
1) Within your deal, click "Services"
2) Select "Credit Bureau"
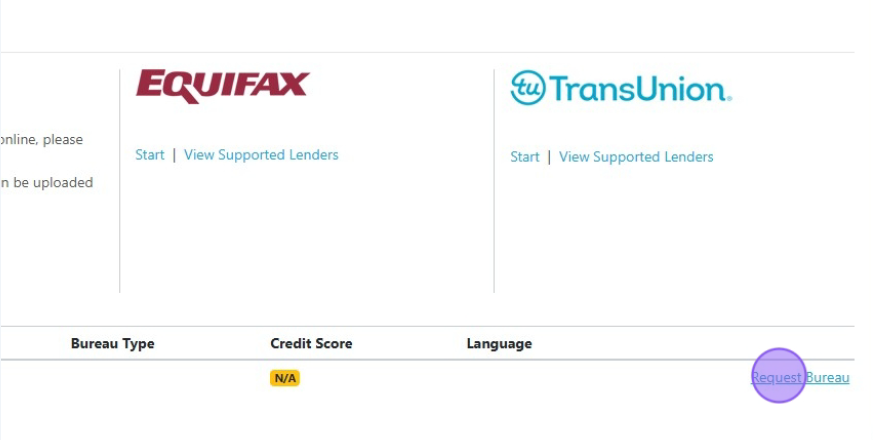
3) To the right of your client's name, click "Request Bureau"
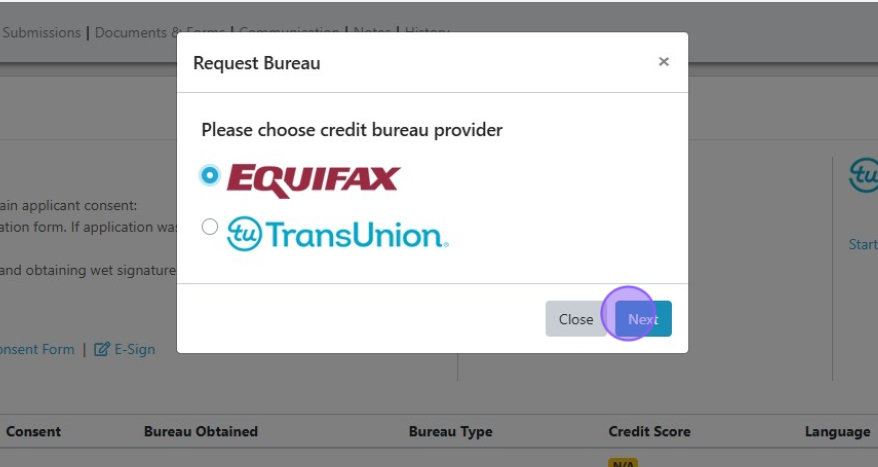
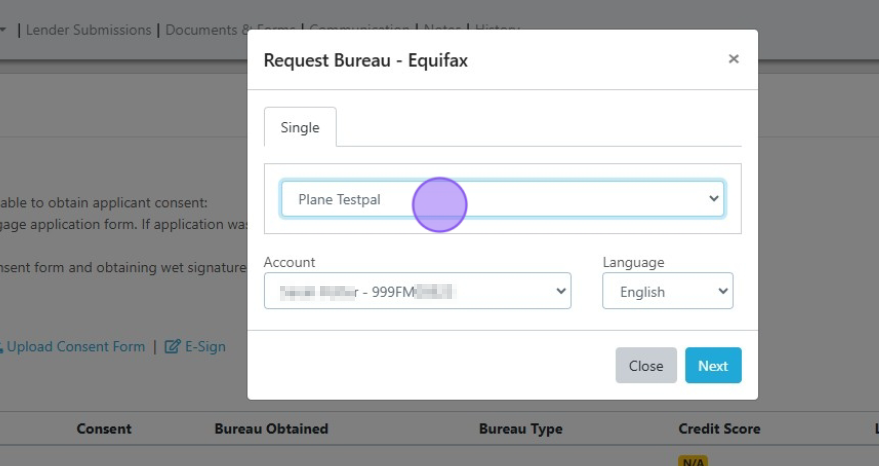
4) Select the credit bureau provider you wish to use and click "Next".
5) Select the applicant you wish to pull credit for.
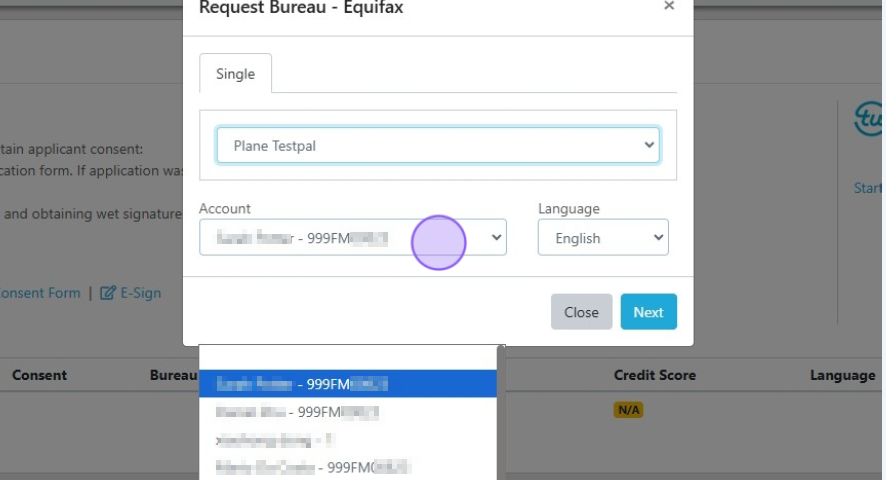
6) Select the account you wish to pull the credit report under. Depending on your role and permissions, you may be pulling under your own name or someone else's. Confirm this with your brokerage.
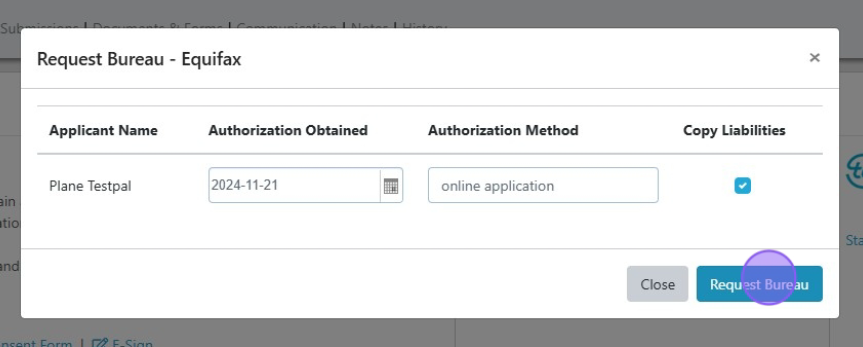
7) Enter the date you obtained credit consent & the method of consent. If you would like the system to automatically populate the liabilities section of Scarlett from the credit bureau tradelines, check the "Copy Liabilities" box. Then click "Request Bureau".
8) The credit bureau information will now populate. You can click on "Preview" or "Preview (Enhanced)" to view the credit bureau in your preferred format.
Liabilities Copied
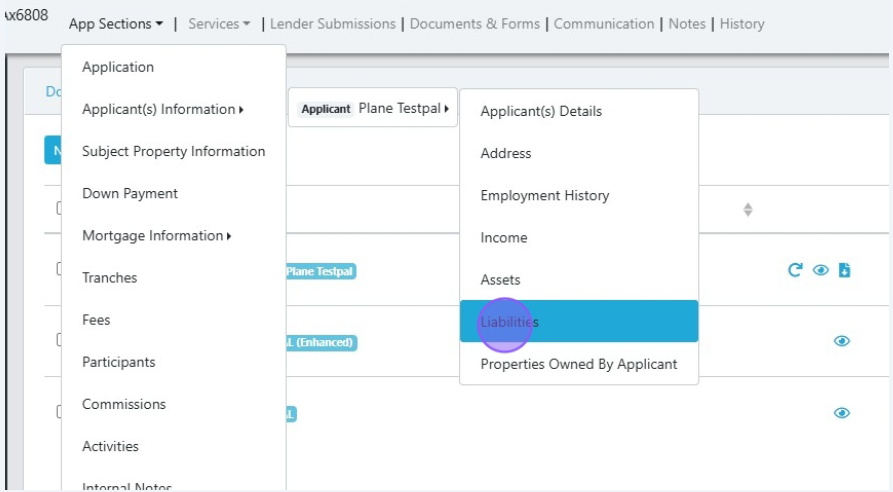
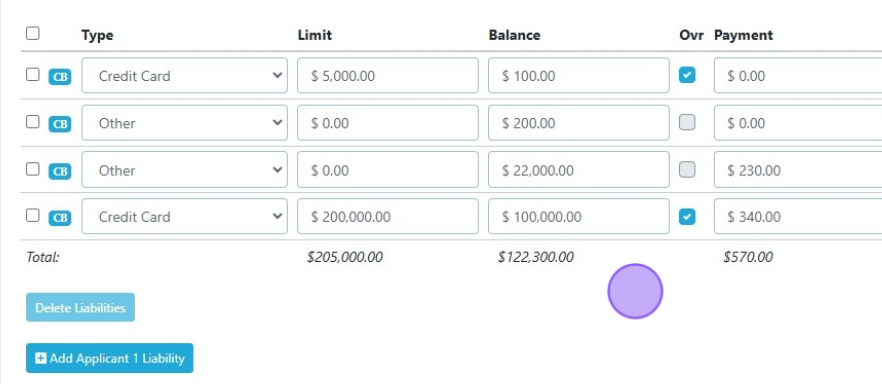
1) Navigate to the Liabilities section of your application.
2) Here you can view the debts brought in by the system from the credit bureau. These are identified with "CB" next to them.
Documents Saved
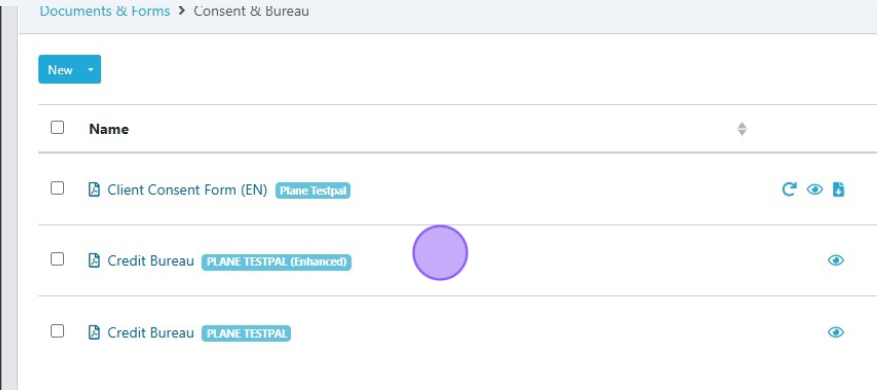
Your uploaded credit consent and pulled credit reports are saved automatically to the documents section of your deal.
1) Click "Documents & Forms" within the deal header.
2) Click on the system-created folder, "Consent & Bureau"
3) Here you can see the relevant documents.
Attaching a Different Credit Bureau to Lender Submission
By default, Scarlett Mortgage will attach the most recent credit pull to the file for lender submission. You can change this, according to the credit bureau rules set by the lender you are submitting to.
1) If you expand the History tab under the applicant name(s), you can see historical credit pulls attached to the file.
These are date stamped according to the credit pull date.
2) To change the credit bureau attached to the file for submission, change the "Submit to Lender" checkbox to the credit bureau you wish to attach.
The system will allow one credit bureau per applicant to be attached to the file.
