
How to Add & Remove Documents in a Document Request
This guide provides step-by-step instructions on how to add and remove documents in a document request. It explains how to add multiple documents at once, apply or edit a note for individual documents, and delete unwanted documents. Viewing this guide would be helpful for anyone needing to manage document requests efficiently and effectively.
Related Training
Step-by-Step Guide
Adding Document(s) to a Document Request
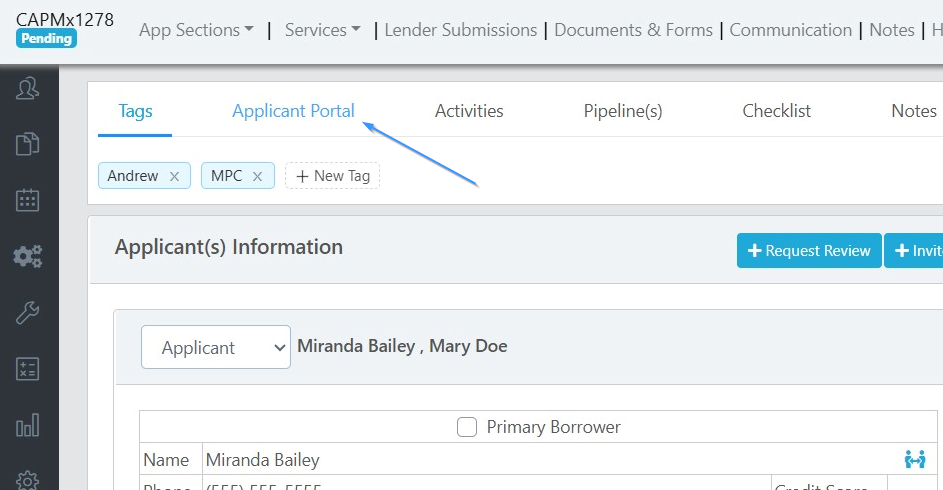
1) Within the deal, click on Applicant Portal.

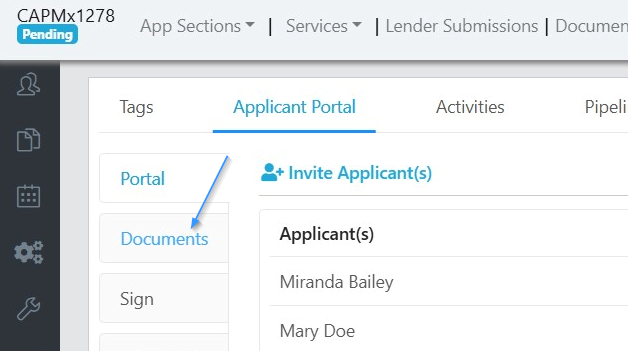
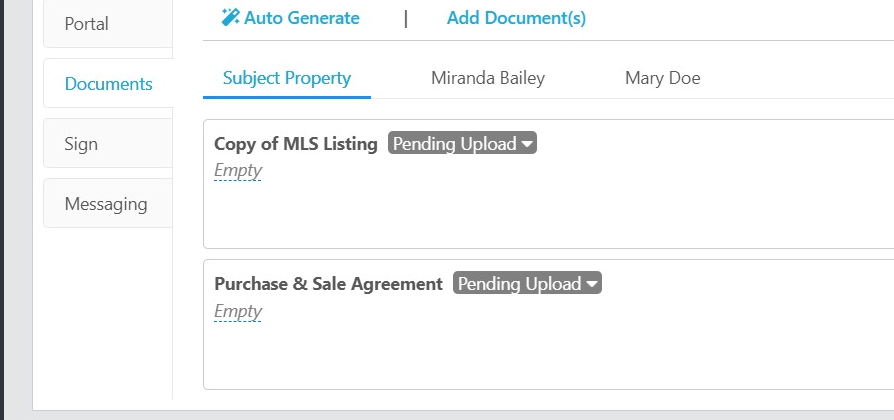
2) Click "Documents".

3) Click on "Add Document".
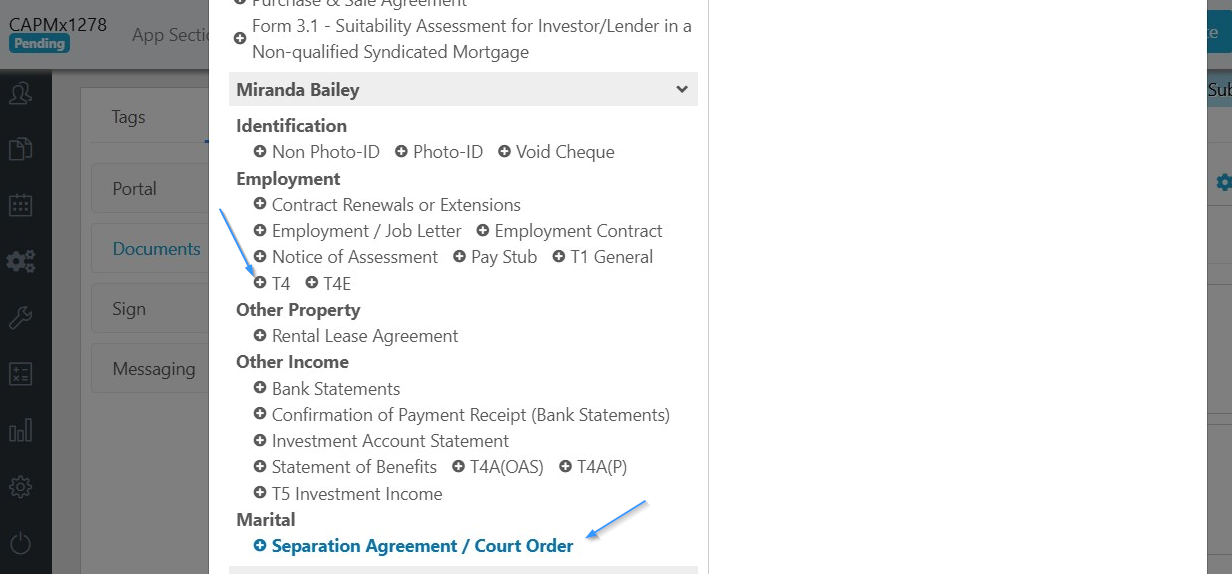
4) This launches the Add Document pop up window where you can select the document you wish to add to any of the tabs for subject property or applicant. Let's add a separation agreement and T4s for Miranda by clicking on those documents.
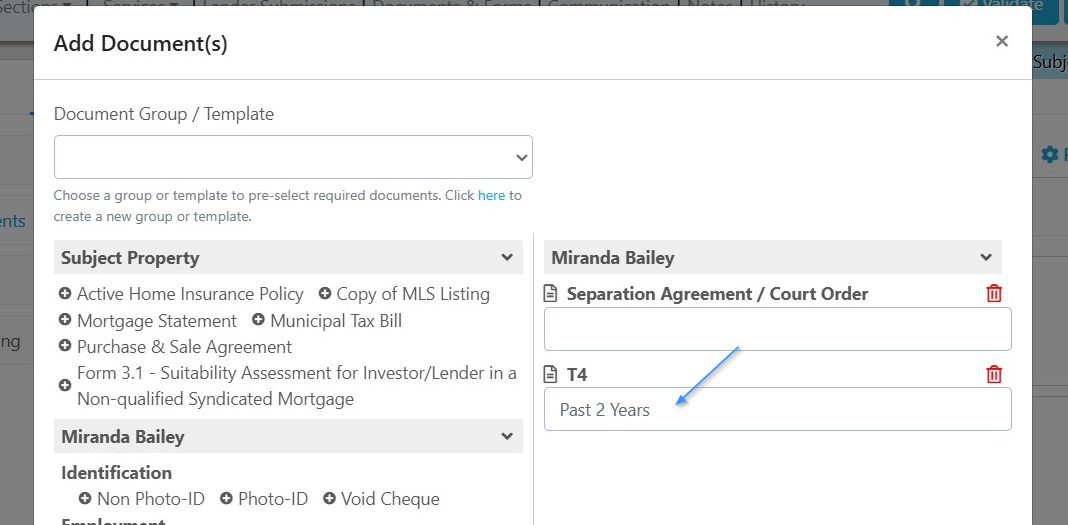
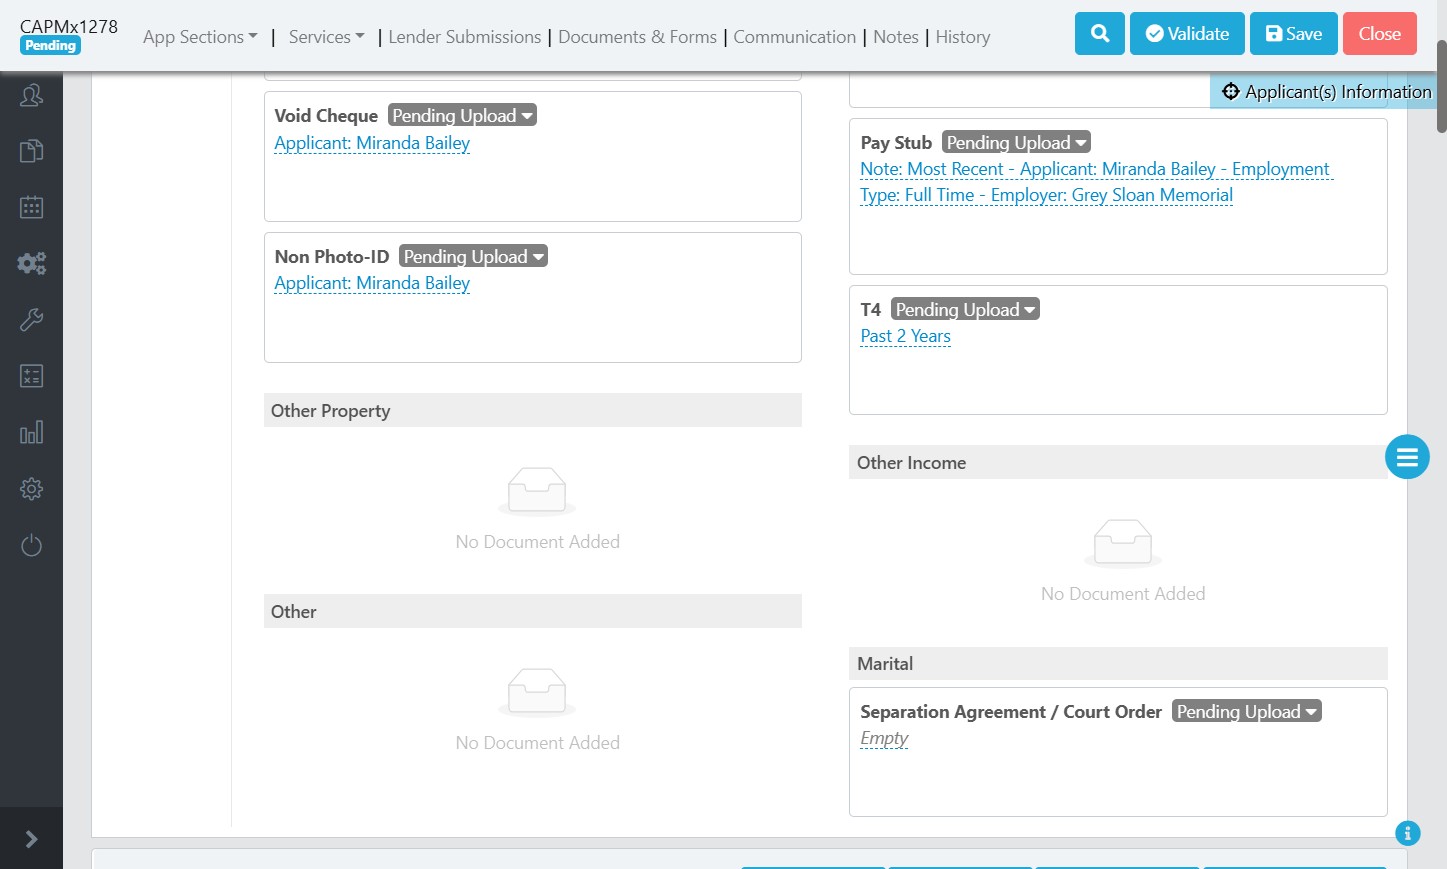
5) On the right side of the pop-up we can see the documents that will be added, and we can edit the notes that will appear with that document. We entered "Past 2 Years" for the note we want displayed next to the request for T4s.
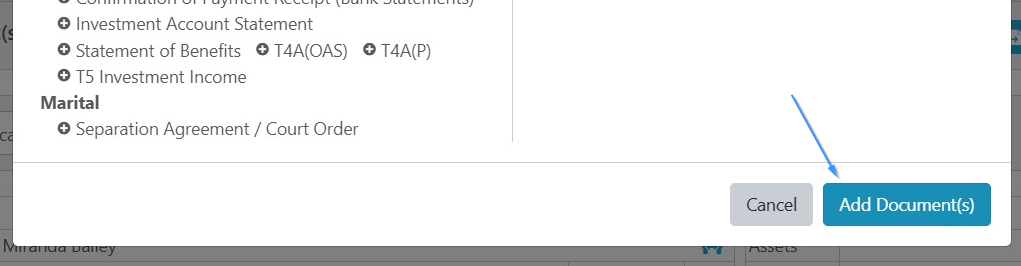
6) Once satisfied with the documents we want added to the request, click "Add Documents".
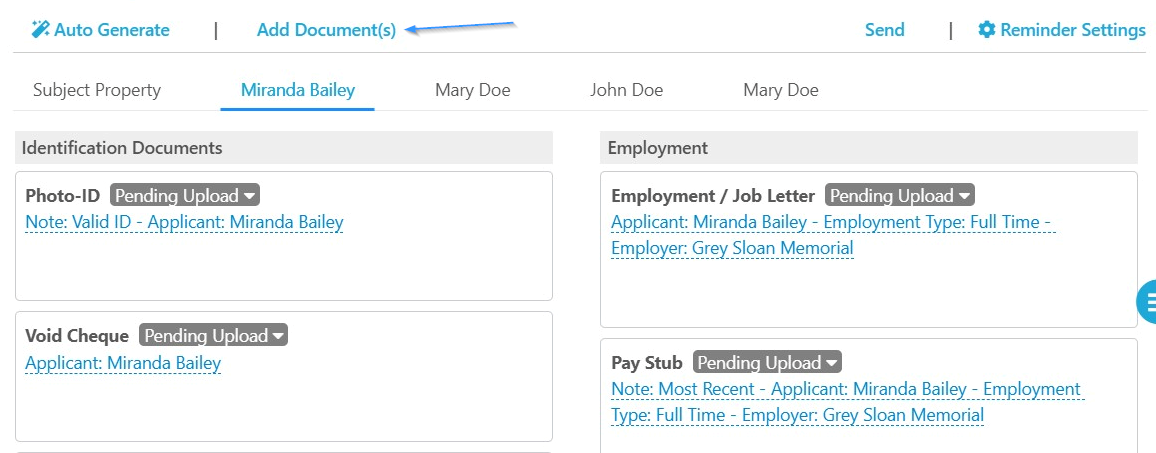
7) We can see these documents now listed under Miranda's tab, including the notes we entered.
Removing a Document(s) from a Document Request
1) Within the deal, click on Applicant Portal.
2) Click "Documents".
3) Click the dropdown arrow next to the document request you wish to remove.
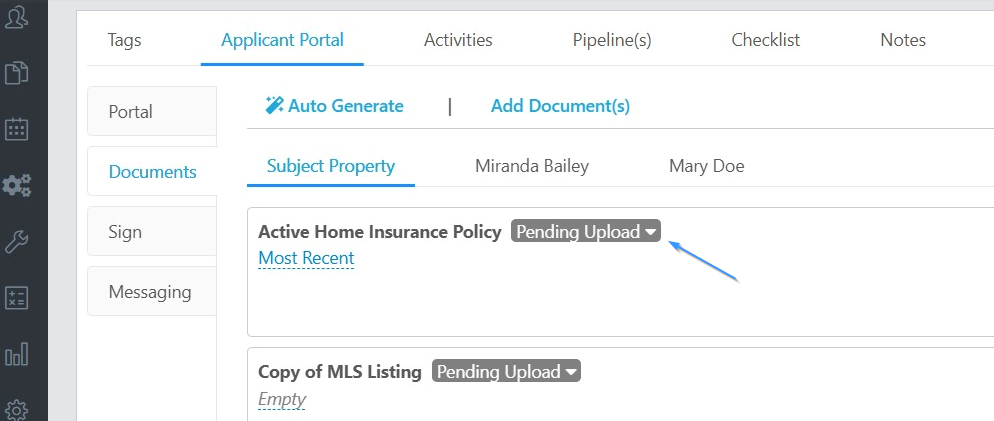
4) Select "Delete".

5) Confirm the deletion by clicking "OK".
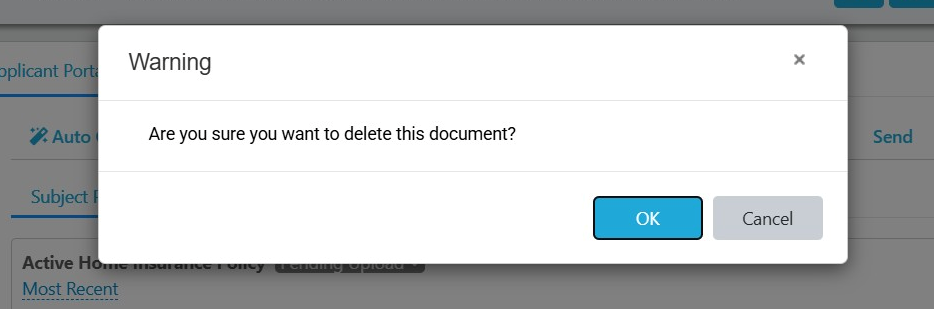
6) The document request has now been removed.
Note: if there were uploaded documents under the document request you want to remove, you would need to delete the documents first, and then can delete the document request.
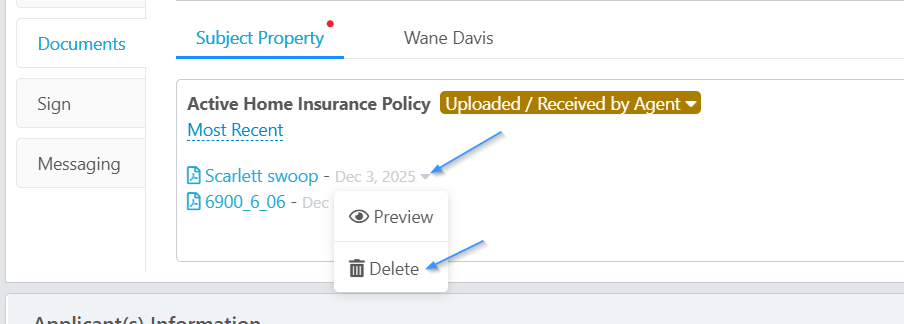
Deleting an Uploaded Document
To delete a document that was uploaded in the applicant portal, click the down arrow next to the document you wish to delete. Then click delete.
To delete documents in bulk, it is easiest to do this from the Documents & Forms section. Please see the related training: Organize Files & Documents
Scarlett Tips
If you are trying to add a document type and it's not available in the "Add Document" section, check that it is categorized in the document list. For more information about this, see the instructions on how to add a custom document to the document library.